 Our piano website


Fender Rhodes 73 Key Refurb Kit


Fender Rhodes 73 Key Refurb Kit
The perfect starting point for any Fender Rhodes and Rhodes restoration!
Share this Product
Product Details
Description
FAQ
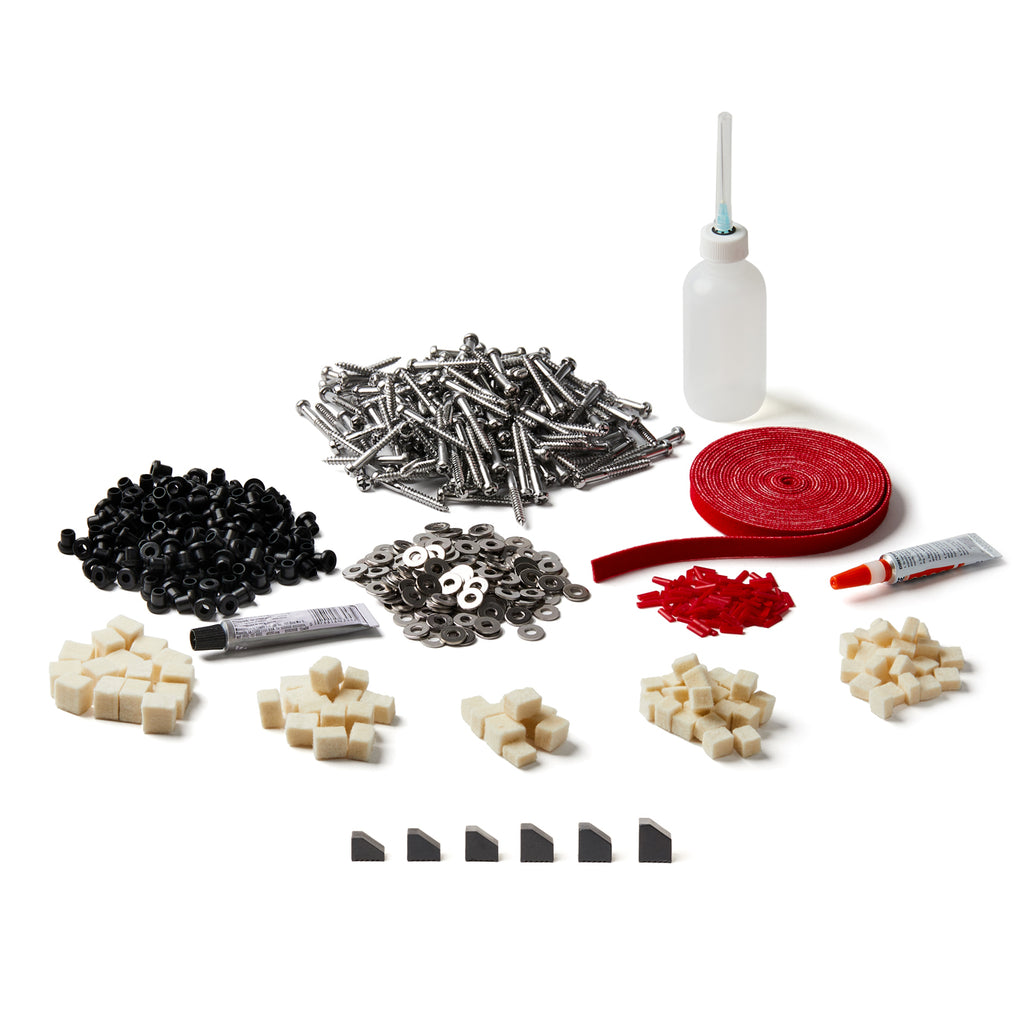
What's Included
Instructions & Guides
Installation Videos
Description
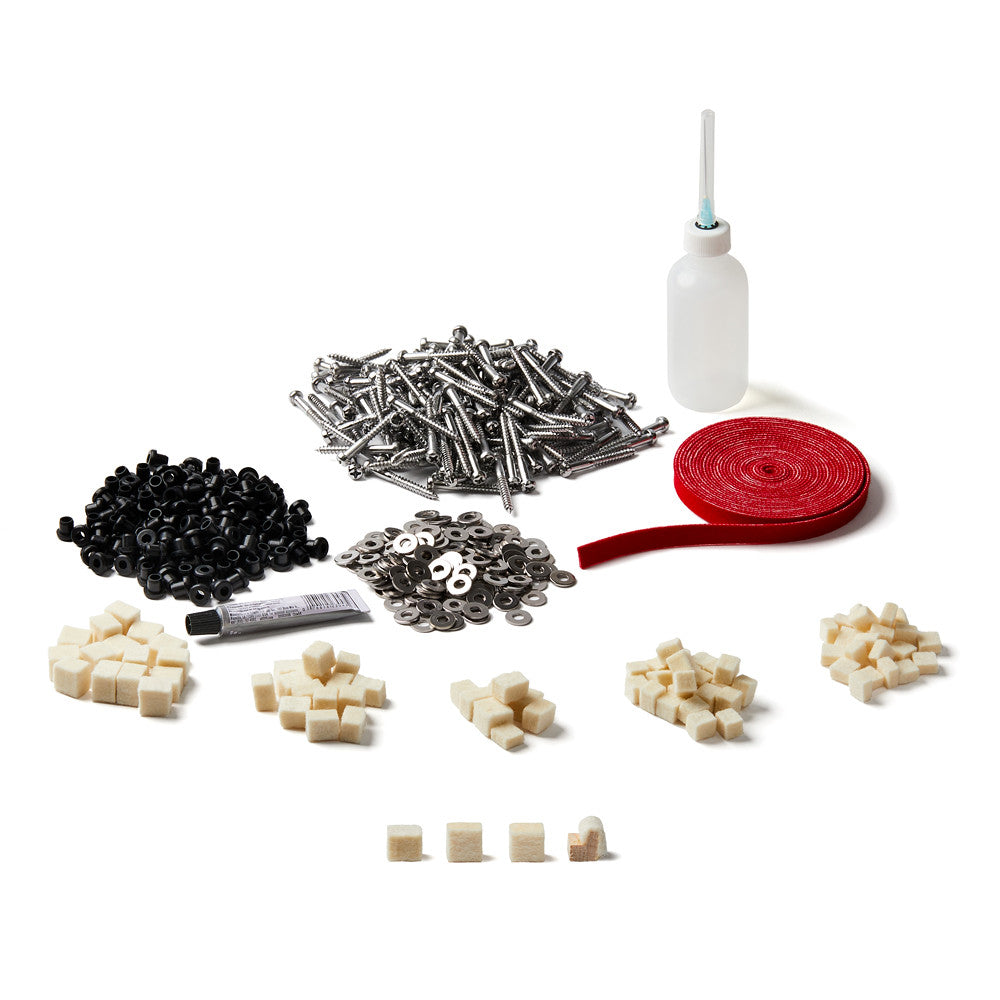
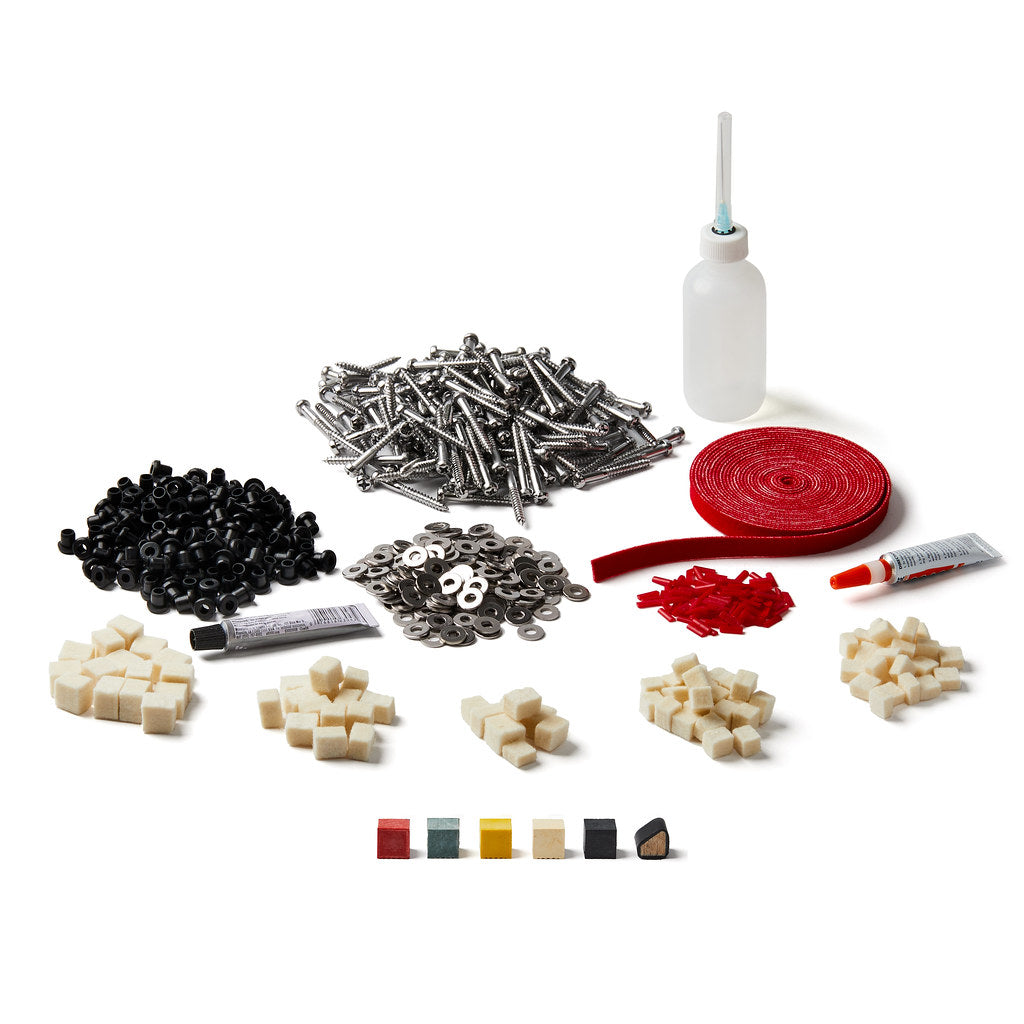
Our full refurb kits contain the absolute essentials for professional restoration of your Fender Rhodes piano. Kits come with you choice of hammer tips, damper felts, tone bar screws and grommets and our legendary "miracle mod" action mod.
First off, if the damper felts on your piano have never been changed, now is the time to do so! Replacing damper felts is one of the "must-do" jobs when restoring a Fender Rhodes piano. Vintage Vibe has carefully thought out the need for damper felts on the Fender Rhodes with a four-part damper felt system - Bass, Pre-Mids, Mids, and Treble. These felts are custom-made and engineered to last decades. Our attention to detail has resulted in the best felts money can buy!
Next is the 'Miracle Mod' is a critical action mod for all Fender Rhodes and Rhodes pianos with soggy and sluggish action. The principle behind the Miracle Mod is that the hammer utilizes the rounded bump which acts as a leverage point as well as a stop lock for the hammer. These are two critical elements are key in a correctly functioning action. The Miracle Mod will work on any year piano up to 1977, even a Marcel pedestal can be improved with a bump. Typically, pianos after 1978 had a bump built into the pedestal
The secret to tone lies within hammer tips. We've designed all of our tips for real durability, great sound quality and maximum playability. Vintage Vibe carries a full line of hammer tips that include square, angled, graduated and felt tips. The tonal opportunities are endless. More information on our line of hammer tips can be found in our Guide to Hammer Tips.
Lastly, the need for new tone bar screws, grommets and washers are paramount to achieving correct voicing, sustain and tone of your piano. Grommets are at the heart of the sustain and vibration of your tine and tone bar. When a grommet becomes old, shrunken and hard it loses it's natural ability to increase the vibration of the tine. In actuality, it starts to choke out the free vibrations causing a short ring time and dull tone. Matching tone bar screws to the mating grommet is also an absolute for voicing articulately. Slightly bent screws cause voicing issues so for proper voicing you'll need to be positive all screws are perfectly straight. We have manufactured the most accurate and correctly coupled nickel plated screws washers and original style tone bar grommets available anywhere. We are the only company who ensures and manufactures mating tone bar screws and grommets.
All parts of these kit are custom manufactured by Vintage Vibe. These are not bought at any supply parts store nor will you find them anywhere but Vintage Vibe and official Parts Distributors around the world.
FAQ
How do I pick the right Refurb Kit for my Fender Rhodes?
The following are ways to tell if your piano needs a Pre 1975 or Post 1975 Damper Felt Kit:
Pictured is a classic example of a Fender Rhodes action with single dampers, half wood half plastic hammers and wood action. If your piano has this type of action then you will want the Pre 1975 damper felt or refurb kit.

Pictured is a classic example of a Rhodes action with damper combs, all plastic hammers and aluminum frame action. If your piano has this type of action then you will want the Post 1975 damper felt or refurb kit.

The following are ways to tell if your piano needs a Pre 1978 or Post 1978 Miracle Mod Kit
1) Remove the plastic lid cover and look in the upper right-hand corner of the harp. There will be a 4 digit code stamp. The first 2 digits correspond to the week. The last 2 digits correspond to the year.
2) Remove the name rail and pull a key out. On any piano made after 1978 will have a factory installed bump to the key pedestal, underneath the red felt. If you find a bump you will choose a POST 78 kit. If you find a flat pedestal you will need a PRE 78 Kit.
3) Stock 1978 Rhodes Stage pianos had smaller black plastic control knobs. Since this is purely cosmetic and knobs could've been replaced or changed, always refer to #2 as your definitive test.
Which hammer tip kit should I choose?
Rhodes Hammer tips generally came in two size variations over the years; a square or cube style and an angled graduated style. Generally speaking, the square or cube style was indicative of earlier Pianos up till around 1977. These early hammer tips were mainly all the same height. After 1977 Rhodes switched to the angled graduated style, which was graduated in size across the scale of the piano. The shortest tips were in the bass and the tallest were in the treble section. The idea for the graduated hammer tips was so that they could regulate the escapement through the use of incremental height adjustments as opposed to adding or removing shims from the harp supports.
Square or Cube hammer tips are not optimal for the Rhodes piano for simple reasons which I will explain. They do not offer a precise strike point; the flat square tip hits the tine and blurs the strike line. The softer the tip, the more the tine sinks into the rubber tip causing further strike line ambiguity, impure tone, double strike and lack of clarity.
Today after 25 years of study and manufacturing hammer tips; Vintage Vibe has determined through research and development that the angled tip far exceeds performance of a square tip.
So which kit for your piano?
It doesn’t matter as both are angled and, both will work equally as well. The idea, originally, for the graduated tips was that the escapement was already set by the differences in Hammer tip Heights when they were assembled at the factory.
Today we know that all pianos need adjustment of escapement and strike line to truly fine-tune and optimize a piano. With that being said, if you do not plan on any escapement or strike line changes you should choose the tip that is closest to the tips you currently have.
If your piano predates 1978 you may want to naturally go with the angled six zone. If your piano is 1978 or later you may want to go with the six zone graduated.
In summary both 6 zone hammer tip kits that Vintage Vibe offer are equally good and offer this exact same tone. It’s how you set your piano up that will make the difference.
We use both in our shop depending on the vintage of the piano, but the only reason for our choice is to keep with style and era.
All Vintage Vibe pianos use 6 Zone Angled.
What's Included
Damper Felt Kit
Choice of kit: Pre 1975 or Post 1975 kit.
You'll want a Pre 1975 kit if your Fender Rhodes piano action has single dampers, half wood half plastic hammers and wood action. You will want a Post 1975 kit if your Rhodes piano action has damper combs, plastic hammers and aluminum frame action.
Miracle Mod Action Kit
Choice of kit: Pre 1978 or Post 1978 kit.
Pre 1978 kits come with felt, bumps, super glue and applicator bottle (for acetone.)
Post 1978 kits come with felt and applicator bottle (for acetone.)
**Pianos after 1978 had a bump built into the pedestal. Therefore you do not need bumps**
Hammer Tip Kit
Choice of kit: 6 Zone Graduated, 6 Zone Angled or Felt.
Tone Bar Screw & Grommet Kit
Instructions & Guides
Square Hammer Tips:


(Click to make bigger or save)
6 Zone Hammer Tips:
6 Zone Hammer Tip Installation Guide
Placement
Square Tips

Felt Hammer Tips:
The felt included in this kit comes with 4 different stock densities, from soft in the bass to firmer in the treble. The bags are labeled Bass (1-26), Mid (27-25), Treble (46-65) and Woodcore (66-73). In order to achieve a proper attack in the upper ranges, you will need to harden the felt even more. This is where the felt hardener comes in to play.
Experiment without hardener first. You will see that the upper notes lack the attack you are used to hearing or are looking for. You will want to add more hardener to the treble than to the mid section. Always do one application at a time and then test to see and hear how you are doing. Make sure you have your amplifier set up to how you normally play.
From the included bottle, pour a capful in the lid. For the first application use your brush to apply a generous coast on to the mid and treble felts (so that they are damp). Do not apply to the bass felts or the wood core. Let dry for a few hours then test. Repeat as necessary. We typically do 3 applications o the treble felts and 2-3 on the mids. Since tone is subjective, you may want more or less.
Orientation of the felts is important. The felts are 3/8" x 3/8" x 5/16". Place felts with the 3/8" side facing up ad the other 3/8 side will be the side you glue to the hammer.